
I spent a large amount of time debugging and solving a strange condition my MacBook got into, making it basically unusable because the disk refilled automatically with unusable “System Data”.
Situation
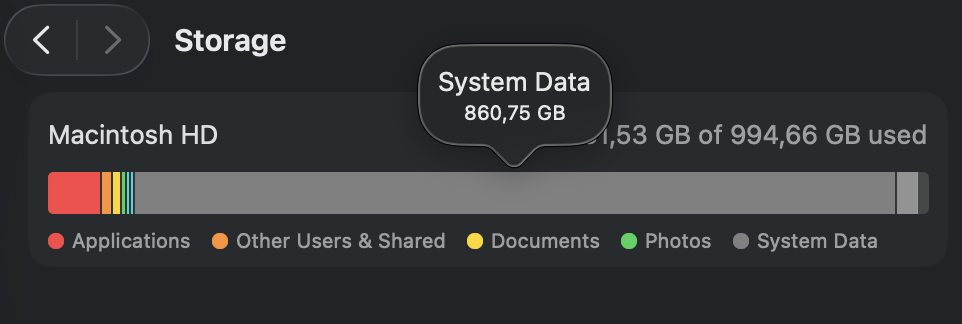
I used my MacBook (Pro, 2023, 32 GB, 1TB HD), for two years with no major issues and a fairly low disk usage. After doing a lot of file operations, including sorting and creating a backup of my Photos library plus deleting some huge files, the “System Data” grew to 860 GB of my 1.000 GB disk. This so-called “file churn” happened over hours after my file operations.
Narrowing Down to Apple Filesystem (APFS)
I used both the tool Grand Perspective as well as the built-in Finder to search for huge files. It’s helpful to configure the Finder with:
- View → Show View Options → Calculate all sizes
- Command + Shift + . to show hidden files and folders
However, the size of the files and directories in my root folder was way less than the whole system storage capacity:

I learned that the folder sizes shown in Finder do not include everything that consumes disk space. MacOS storage can be occupied by:
- APFS snapshots (Time Machine & system snapshots)
- Purgeable space (macOS reserves it, but Finder doesn’t count it)
- Local Time Machine backups
- iCloud / Photos cache & staging data
- Deleted-but-open files
- VM files (swap, sleep image)
- APFS container overhead
Most of these live below Finder’s visibility layer, even with hidden files enabled.
You can verify this by calling
$ df -h /
Besides some other entries, I got:
926Gi 894Gi 10Gi 99% 1.5M 106M 1% /System/Volumes/Data
This reflects the information provided by Settings → Storage and proves that Finder is not showing everything. The df command reflects container-level accounting, not directory visibility, hence showing more disk usage.
Suspect 1: Time Machine Snapshots
After verifying that deleting files in the usual places will not solve the problem, I researched multiple suspects, beginning with Time Machine snapshots as they notoriously consume a lot of space. tmutil is the first command to check:
$ tmutil listlocalsnapshots /
Snapshots for disk /:
com.apple.TimeMachine.2025-12-11-154653.backup
The only entry reveals that Time Machine is most likely not the cause of the problem. If I had encountered many entries, this would have meant many backups that in total would have consumed a lot of disk space.
Turning off Time Machine allows local snapshots to be deleted, but APFS may still keep them until real allocation pressure occurs.
Suspect 2: Deleted But Open Files
It is possible that processes reference deleted files, forcing APFS to hold on to them. Check this with:
$ sudo lsof | grep deleted
I did not get a lot huge entries. The biggest ones were:
> **deleted**    658        stevenschwenke  txt       REG               1,14    34125552 1152921500312571275 /usr/share/icu/icudt76l.dat
> **deleted**    658        stevenschwenke  txt       REG               1,14    10993664            78771832 /private/var/folders/09/0yrljfq513vbvzwf4f39jbpw0000gn/0/com.apple.LaunchServices.dv/com.apple.LaunchServices-11114393-v2.csstore
> **deleted**_h  884                  root  txt       REG               1,14     2299152 1152921500312560823 /usr/lib/dyld
To allow for potentially deleted but opened files to be released, I performed two kinds of reboots:
- Normal reboot via: Reboot → normal startup, no effect on disk usage
- Rebooting in safe mode followed by a normal reboot, no effect on disk usage
Use the following to list all open files:
$ ~ sudo lsof +L1
Because reviewing the output is challenging, sort it by size and display only the size and name of the file (you might have to change the column numbers):
$ sudo lsof +L1 -s | awk '{print $7, $10}' | sort -n
Multiple entries with the same node ID refer to the same inode and can be ignored.
I did not find any huge files I did not expect.
Suspect 3: Purgeable Space
Continuing the search for disk space outside of the normal user-level areas, I ran:
$ diskutil apfs list
APFS Containers (3 found)
...
diskutil apfs list displayed nothing obviously reclaimable, which supports the idea that APFS kept the space internally rather than user-visible snapshots or files.
Suspect 4: VM Files
Another candidate for huge files is virtual machine images.
> $ ls -lh /private/var/vm
total 4194304
-rw------T  1 root  wheel   2.0G Apr  1  1976 sleepimage
The only file listed is not big, so this is also not where to look for the disk space.
Suspect 5: iCloud / Photos Staging Data
Because of the many changes done in my Photos library, this was a very good suspect to look into, so I searched for downloaded photos and cached videos:
$ du -sh ~/Library/Containers/com.apple.photolibraryd
 19M /Users/stevenschwenke/Library/Containers/com.apple.photolibraryd
$ du -sh ~/Pictures/Photos\ Library.photoslibrary
5.1G /Users/stevenschwenke/Pictures/Photos Library.photoslibrary
Again, no huge files appeared on the list.
Suspect 6: /System/Volumes/Data
Widening the search, I looked into the data partition of the disk:
$ sudo du -xhd 1 /System/Volumes/Data
Although a lot of “Operation not permitted” showed up, the visible entries were never near the used disk size. This again strengthens the assumption that the filesystem itself, not visible user files, occupies that space.
At this point, all user-accessible storage was accounted for. The remaining usage had to live in APFS internals or protected system areas.
Approach: Create Allocation Pressure
A rather counterintuitive action is to create more allocation pressure deliberately. Because all user-level causes are ruled out and it appears to be an APFS internal issue, creating huge files could force APFS to release other occupied space.
Because these operations can be dangerous, it is vital to run backups via Time Machine or other means before!
The first approach is creating a huge file with nearly the size of the free disk with mkfile:
$ mkfile -n 10g temp_10GB_file
This created a file nearly instantaneously, but without effect: even creating multiple files with an aggregated size of 90 GB is possible without changing the available disk size of 13 GB. This can be explained by mkfile only creating a sparse file and not forcing block allocation.
Alternative approach with dd:
$ dd if=/dev/zero of=apfs_pressure_test bs=1m
^C10388+0 records in
10387+0 records out
10891558912 bytes transferred in 13.342577 secs (816300997 bytes/sec)
Although the created file filled the complete space and the process stopped when the disk was completely used, deleting this file again did not free up any additional space.
Last Resort: Clean and Rebuild System
After trying to find actions I could perform on the user-level, I decided to reset the system completely and build it up from my backups.
Lessons Learned
APFS is copy-on-write and heavily snapshot-driven. Large delete operations don’t immediately free blocks. Instead, space is released lazily once APFS is confident no snapshot or transaction still references it. Under certain workloads, this reclaim can stall indefinitely.
What did not help until now:
- Reboots
- Safe Mode
- Turning off Time Machine
- Manual deletion
- Searching for solutions at the user level
Backup System
I took a lot of time to check and recheck existing backups and to think about what could be missing.
My Desktop and Documents data are already in iCloud, as well as in Time Machine:
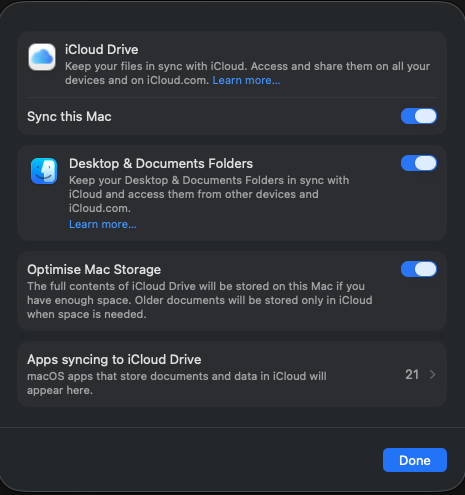
I performed a manual backup of my files in my home folder /Users/stevenschwenke/. It’s important to go through every directory and decide whether it needs rescuing. To see everything, “Show hidden folders” should be enabled.
Candidates to be manually copied to the backup:
- .aws/
- .ssh/
- .config/
- /Users/stevenschwenke/Library/Preferences
- browser bookmarks
- Obsidian vaults (compress first)
What is already backed up safely:
- Passwords in keychain
- Documents (see above, if synced with iCloud)
- Photos (if synced with iCloud)
Very important: App-specific credentials are often stored in the login keychain, not visible in the Passwords app UI. They are preserved by Time Machine and iCloud Keychain, but will be lost if the keychain is not restored. In the scenario of this article, targeting a clean install, this will not be the case. The app-specific access will be lost if the original passwords are not explicitly saved!
Clean Install
After making sure nothing gets lost, I performed the clean install.
Note: System Settings → General → Transfer or Reset → Erase all Content and Settings is not an option because although this resets user data, it doesn’t erase low-level storage that likely causes the problems described above.
I did:
- Shutdown computer
- Restart, holding power until options appear
- Disk Utilities → View → Show all devices
- Erase APFS Volume Group (containing the System Volume and the Data Volume). Format to APFS, scheme GUID.
- Restarts automatically, starting normal setup to activate the Mac
- „Reinstall macOS“ for clean install
Helpful Resource: Explainshell.com
Before executing any command provided by me or any other source, understand it via https://explainshell.com/.
(Image Public Domain, https://pxhere.com/de/photo/867288)